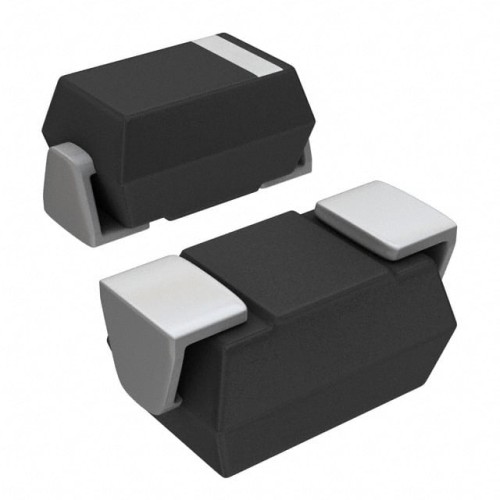
When troubleshooting circuits using the DIODE ZENER 150V 3W DO214AC (3SMAJ5953B-TP), you will most frequently encounter failures related to overstress, heat, or incorrect application. The most common failure modes are catastrophic short circuit, where the Zener becomes a dead short, and open circuit, often caused by a bond wire fusing due to a sustained overcurrent. A less common but tricky failure is voltage drift, where the Zener voltage changes by more than its ±5% specification, typically due to thermal damage or aging from repeated surges.
Begin your debugging with a systematic methodology. Step one: Visual inspection. Look for charring, cracks in the DO-214AC package, or signs of overheating on the PCB around the Zener. If the board is powered, check for physical discoloration. Step two: Power-down resistance checks. Using a multimeter in diode mode, measure from anode to cathode. A healthy Zener will show a forward voltage drop of 0.6V to 0.7V and a high resistance (open) in reverse bias (unless you exceed 150V with your meter, which most handheld meters do not). A short (near 0Ω) in both directions indicates a failed Zener. Step three: Power-up voltage measurement. Apply power to the circuit and measure the voltage across the Zener with a DMM. If it reads exactly 150V, the Zener is regulating. If it reads significantly less (e.g., 12V), the Zener is likely shorted. If it reads 0V, check if the input voltage is present upstream. Step four: Current measurement. Use a clamp-on current probe or break the series resistor to measure current through the Zener. The 3SMAJ5953B-TP is rated for 3W, so the maximum current is 3W / 150V = 20mA. If you measure a sustained current above 20mA, the Zener will overheat and fail. If current is near zero but input voltage is high, the Zener may be open.
Common mistakes in schematic design and PCB layout are frequent with this high-voltage Zener. A critical schematic error is using too small a series resistor. For example, if your input voltage is 200V and you choose a 100Ω resistor, the Zener current could be (200V - 150V) / 100Ω = 500mA, which is 75W of dissipation—far exceeding the 3W rating. Always size the resistor so that the worst-case current through the Zener is less than 20mA, even with input voltage tolerances. Another mistake is using the Zener for transient suppression without a proper series impedance. The Zener can handle brief surges, but a direct connection to a low-impedance source (like a battery) will destroy it. In PCB layout, ensure the copper pads are large enough for heat dissipation. The DO-214AC package relies on the PCB copper to sink heat. A minimal land pattern will cause the Zener to overheat at even 10mA. Place the Zener away from other heat sources like transformers or power resistors. Keep the trace between the Zener and its load short to minimize parasitic inductance, which can cause voltage overshoot during fast transients.
Verifying component authenticity and quality is essential. Counterfeit 3SMAJ5953B-TP parts often have incorrect markings or poor construction. Check the top marking—the genuine Micro Commercial Co part typically has "5953B" or "3B" printed in a clean, laser-etched font. Use a multimeter to measure the Zener voltage at a low current (e.g., 5mA) using a lab power supply and a series resistor. A genuine part should regulate between 142.5V and 157.5V (150V ±5%). Counterfeits often show a voltage 10% or more off-spec. Inspect the package—genuine DO-214AC packages have a smooth, flat surface with no mold flash or rough edges. Weigh the component if you have a precision scale; the genuine part weighs approximately 0.1g. A significant deviation suggests a fake.
For measurement techniques, a digital multimeter (DMM) with a 1000V range is essential for measuring the 150V output. Use a 4-wire Kelvin measurement if you need to measure the Zener voltage accurately under load, as voltage drops in test leads can skew readings at high currents. For dynamic testing, such as checking the Zener's response to a transient, use an oscilloscope with a 10x probe (rated for at least 200V). Set the scope to trigger on a rising edge and watch for the Zener voltage to clamp at 150V during a surge. A thermal camera or IR thermometer is invaluable for finding overheating components; the DO-214AC package should not exceed 150°C at the junction. If you see a hot spot elsewhere, the Zener may be dissipating power correctly but the surrounding circuit may have a fault.
Knowing when to suspect the component versus the surrounding circuit comes down to pattern recognition. Suspect the Zener first if you measure a short or open, especially after a known power surge or if the board shows physical damage. Suspect the surrounding circuit if the Zener is intact but the voltage is incorrect. For example, if your input voltage is 180V, the Zener should drop 150V and the series resistor should drop 30V. If you measure 180V across the Zener, the series resistor may be open (or the load is missing). If the Zener voltage is low but the input is correct, check for a downstream short or excessive load current. A common real-world case: A customer complained that the 3SMAJ5953B-TP failed repeatedly in a power supply. Upon inspection, the series resistor was 47Ω, not 1kΩ as per the design. The Zener was dissipating 1.2W (180V input, 30V drop across resistor, current 638mA—actually impossible, but the error was a wrong resistor value). After replacing the resistor and Zener, the circuit worked. Another case: A design had the Zener placed directly under a heat-sink for a linear regulator. The ambient temperature was 85°C, and the Zener was only rated for 3W at 25°C. Derating at 85°C, the maximum power is about 1.8W, but the circuit required 2.5W. The Zener failed in a few hours. The fix was to move the Zener to a cooler spot and increase the PCB copper area for better heat sinking.
In summary, always verify the series resistor value, check for adequate heat sinking, and measure both voltage and current under load. Use proper test equipment and be suspicious of counterfeit parts. With these steps, you can quickly isolate the root cause of Zener-related failures in your circuits.